
Drawing Trees Tutorial 4 — part 1
by Vincent D Whitehead ©2010Deciduous Oak Tree
If you have worked through the tutorials from the "Gilbert Home Portrait" you will have found that the tree bark work is accomplished by using a series of lines, squiggles, dots (called stipple work) and tone work done by a "drag method" I have developed, in a layering process that produces a believable rendering. The layers build depth and tone and can yield values in as many as 7 strengths. The process requires patience and a very light touch but can produce very believable trees.
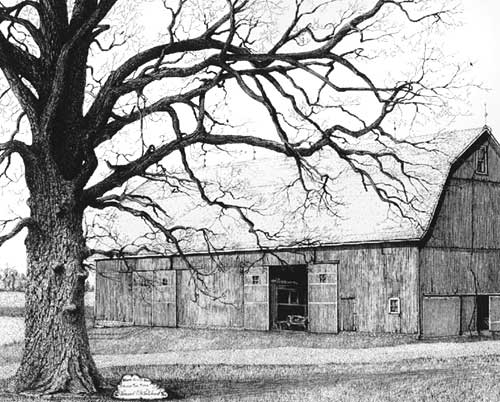
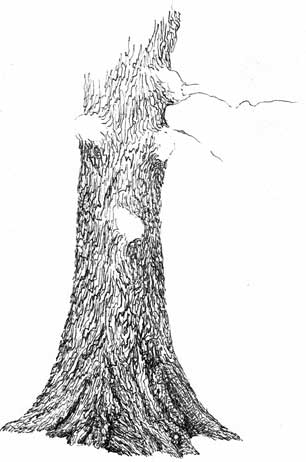
The main tree in the "Gilbert Home Portrait" was a Maple. This tree, an Oak, has a coarse bark and has wonderful characteristics. The Oak that we will now cover has even more character and depth than the maple. This old Oak has been on the property for ever it seems. I choice to do this drawing originally because of this tree and then heard that the barn was to be taken down. Once I heard that, I decided to take a look at it again and eventually decided I could draw the trees I liked and place the barn in the background as it set in real life. That's what I did.
Part 1 - Let's get started...
! Remember, with ball point pen it is always easier to add layers of tone than to try to remove them.
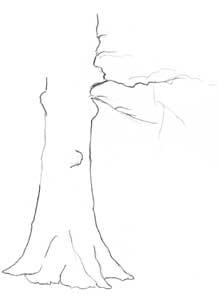
After the medium point tone layers are in you can begin to put in the small angled lines to build out the shadowed areas along the bark edges in the trunk.
! Remember, keep a consistent light source in your work.
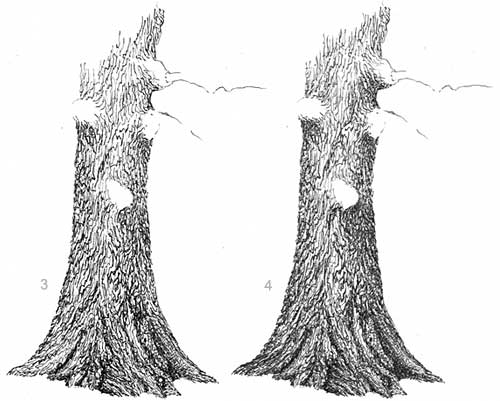
The next layer of tone that will be used is with the medium point pen again but, is done by stipple work. This helps to build up texture and increase areas of shadow in the bark work.
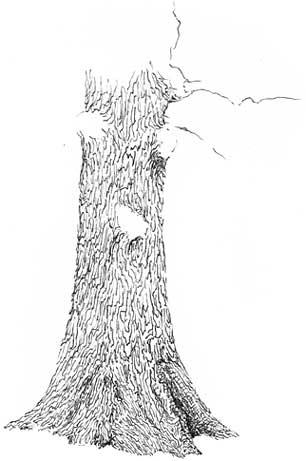
Start at the bottom of the trunk at where the roots come out of the ground. Keeping in mind the shadow areas that will be cast in reference to the light source, add the quick stipple work to the tree trunk work. You won't add stipple work to the whole trunk in every area. Once the stipple work is in you will have a pretty good looking work in progress tree trunk. See images no. 3 and 4:
The last layer is done with the medium point pen again. This is where you use the "Drag" method that we discussed earlier in the tutorial on the maple tree from the Gilbert home portrait.
Laying the pen tip more on its side begin with a light touch and drag the tip over the area that you want to add tone to. It's a pretty quick movement and not meant to leave a distinct line rather more to leave a streak or smeared like layer of tone. You can also blend some of the ink with a blending stump or paper towel rolled tightly together and use just the very pointed tip. You don't want to overly blend any one spot though as you will begin to see a shine on the surface.
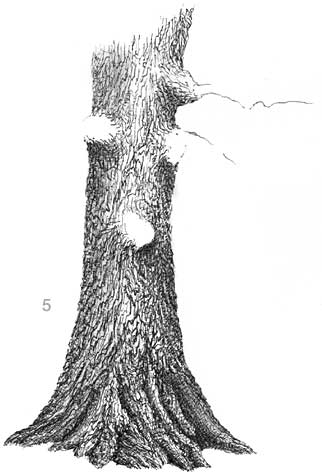
The last layer of line work is done with the Fine point pen. This is where you go in and define some fine details in the bark. I find points that I want to bring out a bit more and reinforce the line that is already there. I also take this time to add any fine line light strokes that need to be added to help build the density of the object. See image no. 5: